

 |
| See the full cake here. |
Here is the recipe I used to make the royal icing:
-2 lbs powdered sugar
-2 Tbsp meringue powder (or egg white powder, you may use 2 egg whites instead)
-1 Tbsp fresh lemon juice
-2/3 C water
Dissolve the meringue powder into the water, then throw everything into your stand mixer and let it go until it is a smooth, even consistency. It should have a "stiff peak" consistency, which means that the peaks of the icing look sharp and don't move. We will actually be using "soft peak" and "flooding" consistencies, but we want to start off with "stiff peak" in case you need to use it for any other decorations (such as flowers). If it is too soft, mix in more powdered sugar until you get the stiff peaks. Now put it all in an airtight container, because it dries quickly. Only pull out what you will be working with. To make the other consistencies, simply add water, little by little, until it is the right consistency. According to one of my books.
Stiff Peak - Suitable for most piping tasks. The icing peaks stay firm and sharp. Don't make it too firm or it will be difficult to pipe.
Soft Peak - This is the basic consistency for flat icing a cake. The icing should hold a peak that just falls over slightly at the tip.
Flooding - To "flood" a shape, the icing needs to be much looser. To test, spoon a little into a bowl and the lines and edges of any peaks should fade within 8 seconds.
What you'll need to make the butterflies:
-food coloring (I use AmeriColor gel dyes, but I think any food coloring will work)
-pastry bags (I prefer using parchment triangles and making disposable bags because it really minimizes the clean up time)
-template of butterfly outline(s)*
-wax paper or parchment paper
-Wilton tip 3 (or other small round tip)
-cardstock
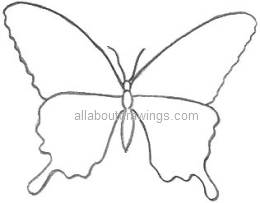
*Note: I got the templates from the book Pretty Party Cakes, but any simple outline of butterfly wings would work. Here's one I just found at the top of my Google search:
Directions
1. Mix your colors and prepare your pastry bags.
2. Put wax paper over template. Using Wilton tip 3 and soft peak icing, pipe the outline of the butterfly wings (do not pipe the body).
3. Use flooding icing to fill the top wings. If you will be decorating with sprinkles or sugar, apply now. Allow to dry.
4. Use flooding icing (in a complimentary color, if desired) to fill the bottom wings. It should meet the top wings (so the actual piped outline in the middle of the wing is no longer visible). As before, if you are using sprinkles or sugar, apply now. Allow to dry.
5. Repeat for all butterflies.You may also decorate them by piping dots in a contrasting color once the wings are dry.
6. Pipe a couple of feelers (antenna) for each butterfly in a matching color on a piece of wax paper.
7. Let everything dry and set for at least 2 days in a warm dry place.
8. Fold some pieces of cardstock or thin cardboard into a "V" shape to support the wings and line with a piece of folded wax paper.
9. Pipe a small line of royal icing in a color matching the butterfly into the fold of the paper. Lift the wings with a small spatula and place them in position on either side of the "V" shape. Allow to dry.
10. Pipe a head and a body in the middle between the wings and stick 2 feelers carefully into the head. Allow to dry in position for at least 3 hours.


